
Let’s Encrypt now has the possibility to create wildcard certificates which makes things much easier if you are hosting many different sites or servers with the same domain which all need SSL certificates. Here I will describe how to implement that.
IBM HTTP Server: Managing SSL Certificates from the command line
Sometimes one is not allowed to use graphical commands in a Linux environment so that you cannot use the “ikeyman” tool to create keyfiles for IBM HTTP Server and import SSL certificates to it. In this article I document the commands to do these tasks from the Linux command line:
Create a key file
/opt/IBM/HTTPServer/bin/gskcmd -keydb -create -db "/opt/IBM/HTTPServer/ssl/key.kdb" -pw demodemo -type cms -expire 3600 -stash
List certificates in a key file
/opt/IBM/HTTPServer/bin/gskcmd -cert -list -db "/opt/IBM/HTTPServer/ssl/key.kdb" -pw myKeyFilePassword -type cms
Import a PKCS12 certificate to a key file
/opt/IBM/HTTPServer/bin/gskcmd -cert -import -db "/opt/IBM/HTTPServer/ssl/mycertificate.p12" -pw myCertificatePassword -label myLabel -type pkcs12 -new_label myLabel -target "/opt/IBM/HTTPServer/ssl/key.kdb" -target_pw myKeyFilePassword -target_type cms
Show the default certificate
/opt/IBM/HTTPServer/bin/gskcmd -cert -getdefault -db "/opt/IBM/HTTPServer/ssl/key.kdb" -pw myKeyFilePassword -type cms
Set the default certificate
/opt/IBM/HTTPServer/bin/gskcmd -cert -setdefault -db "/opt/IBM/HTTPServer/ssl/key.kdb" -pw myKeyFilePassword -type cms -label myLabel
IBM Connections CCM: Activity Stream entries are delayed
I did have the problem that if someone uploaded a file to a CCM library within a Community, the Activity Stream entries for “Recent Updates” and the users homepage did not appear immediately but appeared only the next day at 12:00 am.
The reason for that was, that someone had created schedules for the CCM Sweep Subsystem. One schedule for every day, starting at 12:00 am.
You can find that setting in the ACCE under “ICDomain -> Sweep Subsystem: Schedule”:
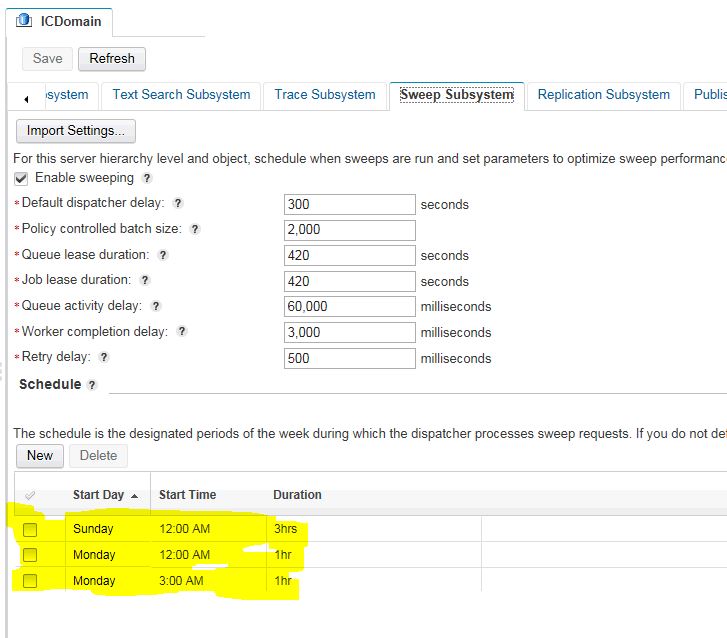
After I deleted all schedules (on the screenshot you just see three entries, you need to scroll down to see all schedules that are defined!) and saved the configuration in the ACCE, all activity stream entries for that day were published immediately and now the entries appear immediately after a user uploads a files …
IBM Connections CCM – FNRCD0002E – ERROR The database vendor cannot be determined from the JNDI data source
IBM Connections Content Manager (CCM) was no longer working for a customer although everything was ok a few days ago. While starting the CCMCluster the following error occurded in SystemOut.log:
FNRCD0002E - ERROR The database vendor cannot be determined from the JNDI data source or is an unsupported type. Check the data source and verify the database connection.
com.filenet.api.exception.EngineRuntimeException: FNRCD0002E: DB_BAD_DATABASE_VENDOR: The database vendor cannot be determined from the JNDI data source or is an unsupported type. Check the data source and verify the database connection.
at com.filenet.engine.dbpersist.DBContext.determineDatabaseType(DBContext.java:882)
Solution:
The customer changed the Linux access rights for “/tmp” for whatever reason. The changed the owner and also removed the rights for writing for “Others”. Therefore DB2 was no longer able to write some files to “/tmp” as the user “db2inst1” has no right for writing anymore. Also the stickybit was no longer set for “/tmp”:
Rights before:
drwxrwxr-x. 20 wasuser wasuser 57344 Feb 28 03:48 tmp
Rights after “chmod 1777 /tmp”:
drwxrwxrwt. 20 root root 57344 Feb 28 03:48 tmp
Then, after restarting the whole envrionment including the DB2, everything worked again.
ICMP redirects no longer working
I do have a test LAN with its own IP range and I want to reach that test LAN from my productive LAN.
For that, I have a software router based on pfSense, which has one virtual network interface in my production LAN and one in the test LAN. On my main router I added a static route for that.
About two weeks ago, that setup suddenly did no longer work. At least from all Linux and Mac OS based machines, I was unable to reach IP addresses in the test LAN. From Windows machines this still did work.
To be able to explain it a bit better, let us assume the following IP addresses:
Production network: 10.1.1.0
Test network: 10.1.2.0
IP address main router: 10.1.1.1
IP address pfSense (in production network): 10.1.1.130
IP address pfSense (in test): 10.1.2.1
Static route on main router: 10.1.2.0 via 10.1.1.130
The message I got, if I tried to ping an address in the test LAN (e.g. from a machine with IP 10.1.1.120), was something like
ping 10.1.2.10
From 10.1.1.120: icmp_seq=6 Redirect Host(New nexthop: 10.1.1.1)
So it is quite normal that the main router sends the client an ICMP redirect, because there is a more direct route to the 10.1.2.0 network via the pfSense virtual router on 10.1.1.130. So no need to go first to 10.1.1.1.
The Windows machines were still correctly responding to these ICMP redirects, the Linux and Mac OS machines did not.
I have no idea what might have changed, in either my network configuration or in Linux/Mac OS, that this no longer worked. Maybe there was some kind of patch currently delivered to Linux and Mac OS which disabled that.
However, because ICMP redirects could be a potential security whole, I decided that all machines in the production LAN should get a direct the static route to the test network. As all my devices are using DHCP to configure the network parameters automatically (also the ones which should have a fixed IP address!), I was able to just push the static route via the DHCP “classless static routing” option. So no need to configure it on every single device. This should work with most of the current devices.
The DHCP option for classless static routing is “121” and you need to use a special syntax for that:
121,subnetmask,netaddress,router address
So for the example above (class C network, network 10.1.2.0/24, address of the router 10.1.1.130) it is:
121,24.10.1.2,10.1.1.130
Here are the steps for DNSMASQ (the DHCP server I am using on my OpenWRT based router):
- Edit “/etc/config/dhcp”
- Add the following dhcp_option line to your DHCP LAN definition:
...
config dhcp 'lan'
...
   list dhcp_option '121,24.10.1.2,10.1.1.130'
...
- Restart DNSMASQ:
/etc/init.d/dnsmasq restart
Now as soon as a device renews its DHCP configuration, it should also get a static route to the 10.1.2.0/24 network via 10.1.1.130.
Update:
If you add a “classless static routing” option, then Linux machines ignore the default gateway and only set the routes added via the classless static routing. So you need to set also the default gateway like that (default gateway is 10.1.1.1):
...
config dhcp 'lan'
...
   list dhcp_option '121,24.10.1.2,10.1.1.130,0.0.0.0/0,10.1.1.1'
...
Dockingstation für iPhone und Apple Watch
Immer mehr Geräte wollen auf dem Nachttisch Platz finden. Damit das Ganze nicht in einen unordentlichen Kabelsalat ausartet, habe ich nun diese Dockingstation für iPhone und Apple Watch auf dem Nachttisch stehen:
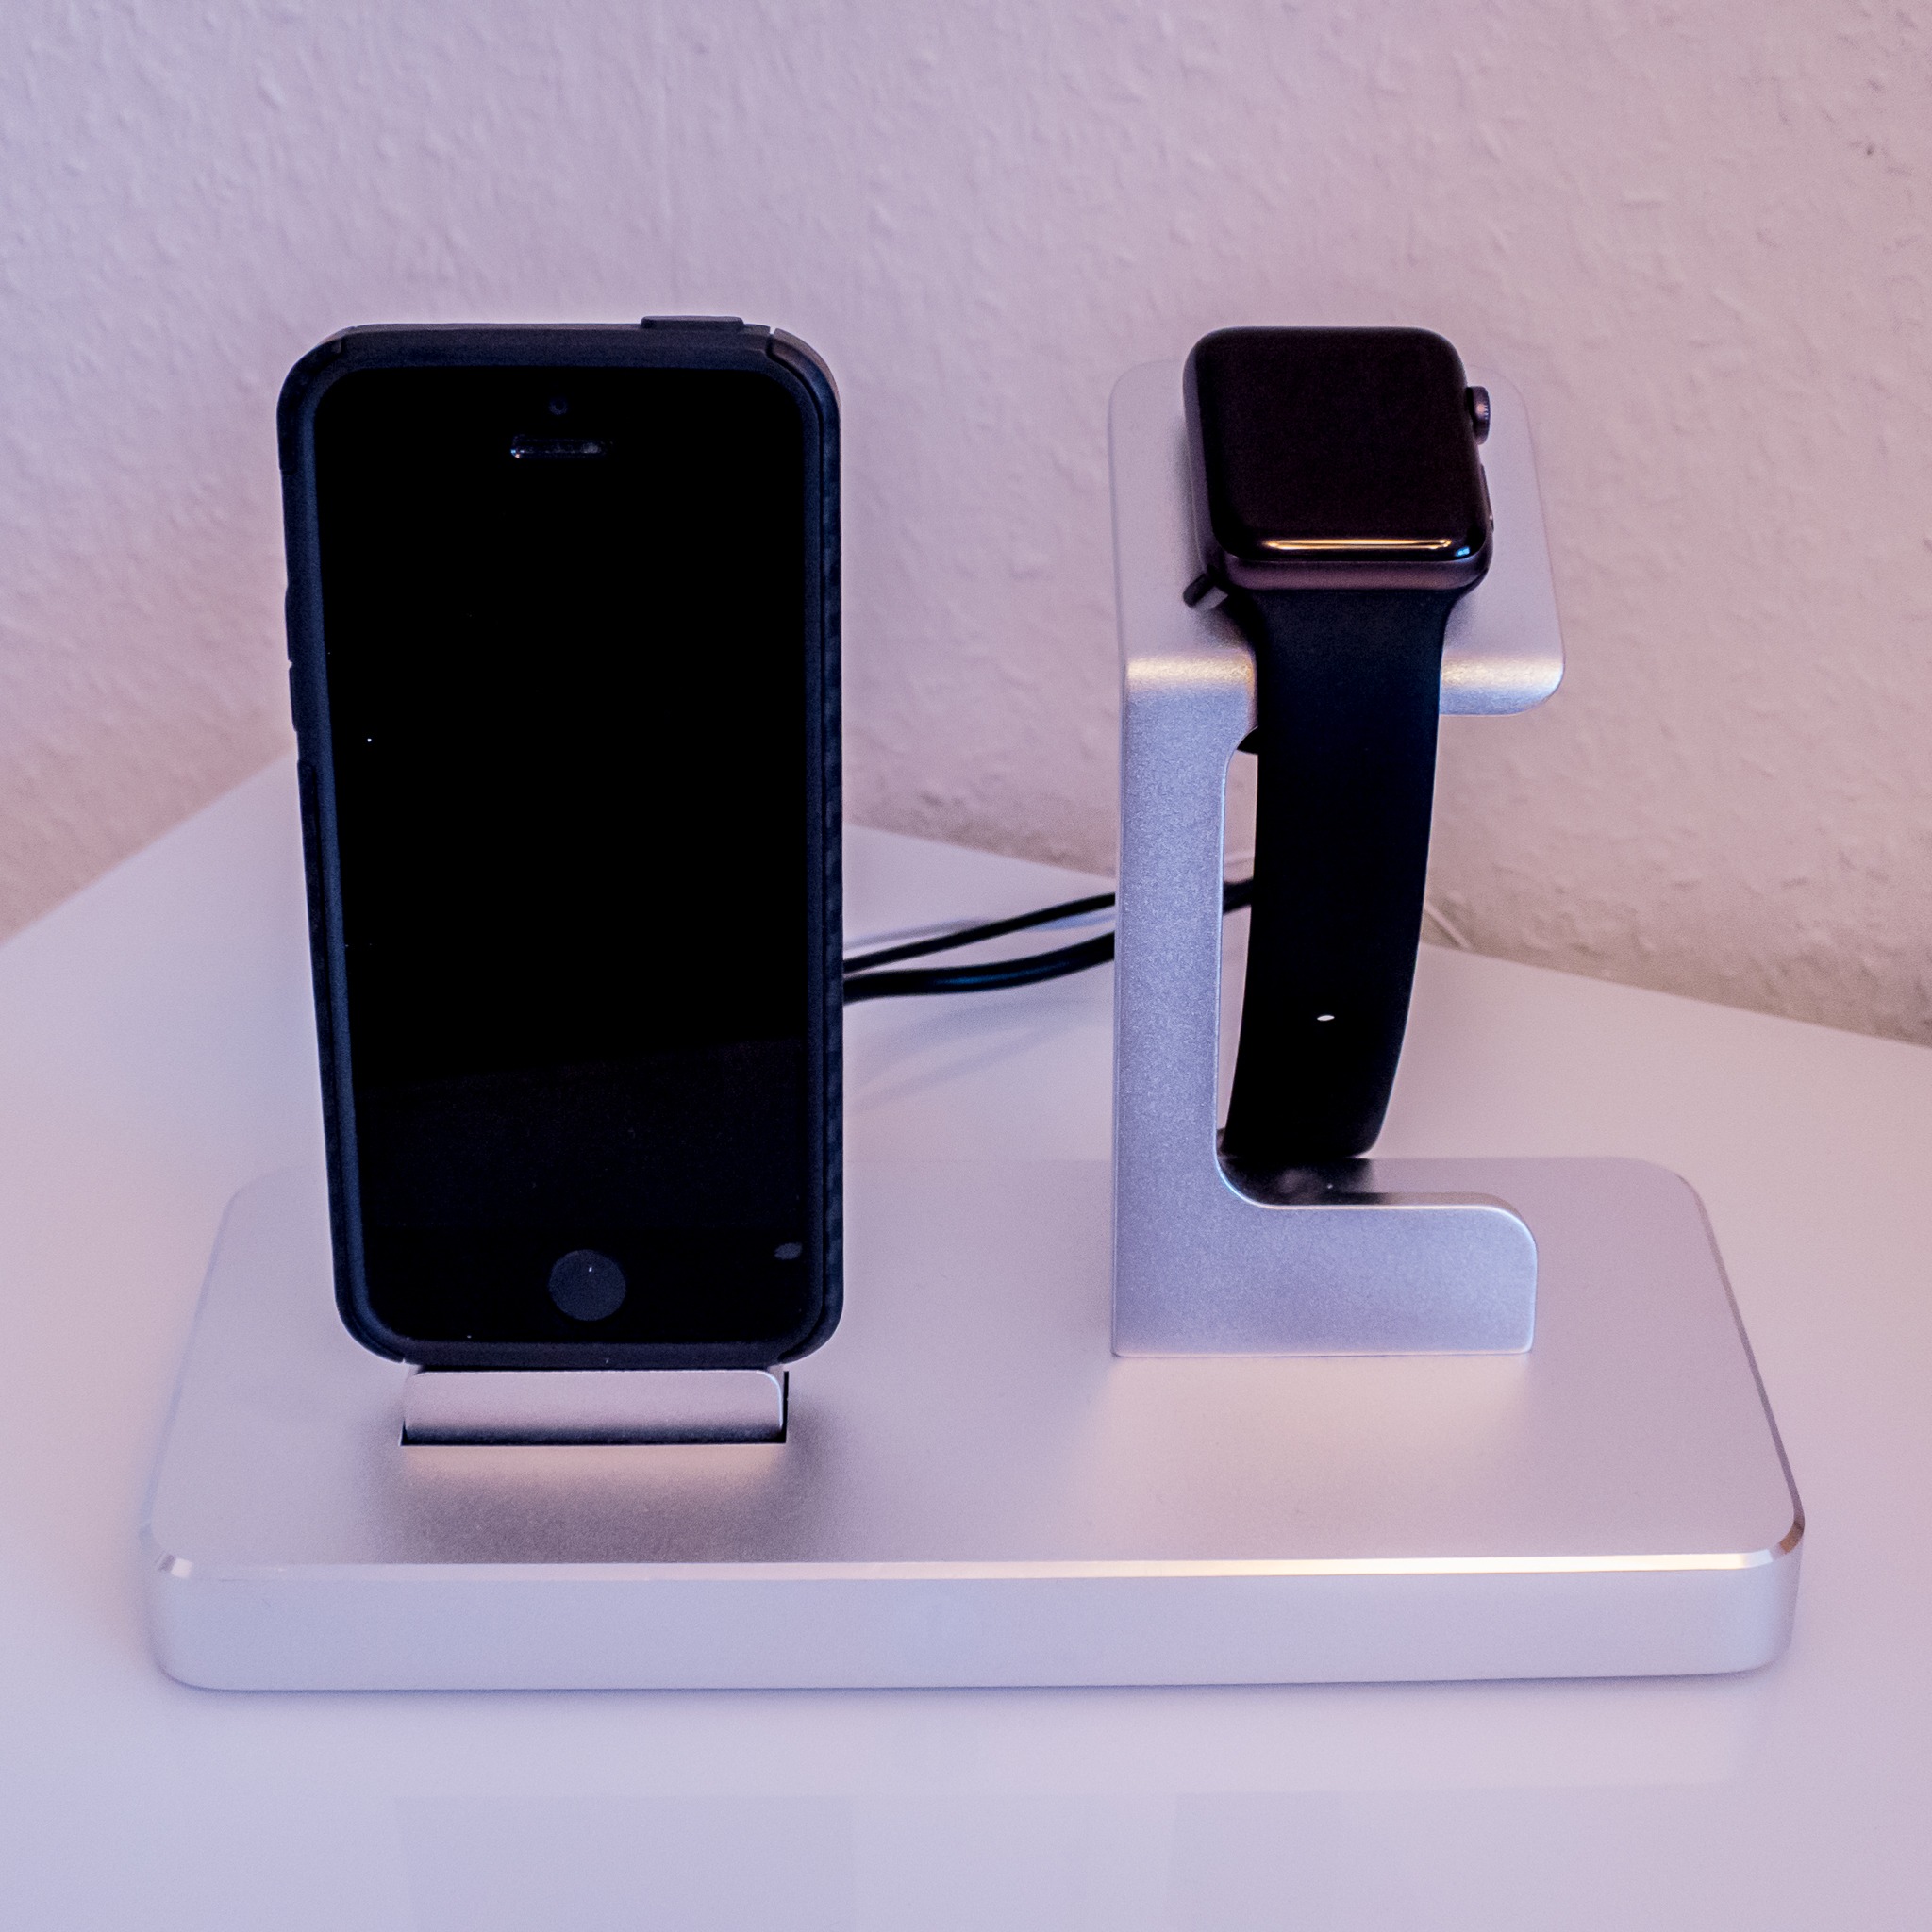
Die Dockingstation kommt mit einem 48W-Netzteil und hat zusätzlich noch 2 USB-Anschlüsse um bis zu zwei weitere Geräte zu laden. Bei mir wird z.B. noch der Kindle aufgeladen (auch wenn das nur alle paar Wochen mal nötig ist …).
Man kann die Watch zwar auch quer auf die Halterung legen. Allerdings ist der Winkel nicht steil genug, so dass die Uhr nicht in den Wecker-Modus geht. Das sollte man wissen, falls man dieses Feature benötigt. Ich selbst nutze das Feature aber nicht.
Leider wird bei der Dockingstation kein eigenes Kabel für die Apple Watch mitgeliefert, so dass man das noch zusätzlich bestellen muss. Und da ärgert mich mal wieder die Apple-Preispolitik. Für ein Lade-Kabel 35 EUR zu verlangen, ist einfach ein Witz. Leider gibt es wohl keine günstigeren Nachbauten bislang.
Zusätzliches Netzteil für den Macbook Pro
Mein Netzteil für das Macbook Pro ist zuhause am Schreibtisch ein wenig verbaut und es ist ziemlich mühsam, jedesmal umzustecken, wenn ich das Macbook irgendwohin mitnehme. Daher musste ein zusätzliches Netzteil her. Da ich keine Lust hatte, über 80 EUR für ein Original-Apple-Netzteil auszugeben, habe ich nach günstigeren Alternativen gesucht.
Meine Wahl fiel auf das Salcar 60W Magsafe 2 T Form . Das Teil ist 145 gr. leicht und hat zusätzlich noch 2 USB-Ladeports mit 2 A.
Damit kann ich neben dem Macbook auch noch mein iPhone oder mein Bluetooth-Headeset laden und den UMTS-Router mit Strom versorgen, wenn ich unterwegs bin. Und ich muss dafür keinen der USB-Ports am Rechner verbraten. Die bleiben dann frei für USB-Stick und externe Platte.
Zusammen mit so einem Kombi-USB-Kabel lässt sich so ziemlich alles laden, was man so mit dabei hat.
Auch wenn noch keine Langzeiterfahrungen vorliegen, bisher eine klare Kaufempfehlung.
Some issues with Migration of IBM Connections 5.0 to 5.5
I had some new issues while migrating a customer environment from IBM Connections 5.0 to 5.5 (Oracle) and I would like to document them here:
ORA-01722: invalid number during Homepage upgrade
While running the script “homepage/oracle/upgrade-50CR4-55.sql” we got the following errors in the log file:
DECLARE
*
ERROR at line 1:
ORA-01722: invalid number
ORA-06512: at line 17
The reason for that was, that the sequence of the columns in the table “HOMPAGE.NR_DISCOVERY_VIEW” was different from the sequence of the columns when you create that table from scratch. I guess it was because this table has been upgraded already many times (since IBM Connections 3.0). We had another (test) environment where the sequence of the columns were correct (but the database of that environment has been created from scratch somewhere in Connections 4.5 or so).
The SQL script does read the content of a database row into an array and then uses this array to insert the data to another table. While inserting the data via an array, the target table needs to have exactly the same order of the columns in order to insert the values into the right column.
To solve the issue I changed the following statement from
DECLARE
CURSOR s_cur IS
SELECT
CATEGORY_READER_ID, READER_ID, 23 CATEGORY_TYPE, SOURCE, CONTAINER_ID, ITEM_ID, ROLLUP_ENTRY_ID,
RESOURCE_TYPE, CREATION_DATE, STORY_ID, SOURCE_TYPE, USE_IN_ROLLUP, IS_NETWORK, IS_FOLLOWER, EVENT_TIME, IS_STORY_COMM,
IS_BROADCAST, ORGANIZATION_ID, ACTOR_UUID, ROLLUP_AUTHOR_ID, IS_VISIBLE, COMMUNITY_ID
FROM HOMEPAGE.NR_DISCOVERY_VIEW;
to
DECLARE
CURSOR s_cur IS
SELECT
CATEGORY_READER_ID, READER_ID, CONTAINER_ID, ITEM_ID, RESOURCE_TYPE, CATEGORY_TYPE, CREATION_DATE, SOURCE, STORY_ID,
SOURCE_TYPE, ROLLUP_ENTRY_ID, USE_IN_ROLLUP, IS_NETWORK, IS_FOLLOWER, EVENT_TIME, IS_STORY_COMM,
IS_BROADCAST, ORGANIZATION_ID, ACTOR_UUID, IS_VISIBLE, ROLLUP_AUTHOR_ID, COMMUNITY_ID
FROM HOMEPAGE.NR_DISCOVERY_VIEW;
which then solved the issue.
No migrated entries in “Discover” view of the Homepage
After the migration, the “Discover” view on the Homepage was empty. Only new entries appeared but all entries from before the migration were not displayed. I solved that by changing the same SELECT statement mentioned above from
...
SELECT
..., 23 CATEGORY_TYPE, ...
FROM HOMEPAGE.NR_DISCOVERY_VIEW;
to
...
SELECT
..., CATEGORY_TYPE, ...
FROM HOMEPAGE.NR_DISCOVERY_VIEW;
The old statement writes the value “23” to that column in the target table, regardless of the original value. The original value of all entries in our case was “17”. So we just removed the “23” in front of the column name so that the correct values were written to the target table. Afterwards the “Discover” view has been populated correctly with the values from before the migration.
Additional Homepage java migration necessary for 5.0 to 5.5
We also realized that a Java migration for Homepage is not only necessary while migrating from 4.5 to 5.0 but also while migrating from 5.0 to 5.5. This is not currently mentioned in the documentation. There is one hint here, but the description in this chapter is currently not correct and should not be used that way. The correct way to do the Java migration from 5.0 to 5.5 for Homepage including the missing JAR file can be found in that technote.
Be aware of the fact that the parameter for JDBC URL, DB User and DB password do not have a prefix like “-dburl / -dbuser / -dbpassword” but just written without that. This is different from the Java migration for version 4.5 to 5.0. And also make sure you got the newest version of that JAR file in the technote. It has been updated January 11th, 2017 with a new version (fixed bugs for Oracle).
Wrong documentation which scripts should be run for Homepage migration
The documentation has currently a wrong description which SQL scripts you should run for upgrading Homepage if your DB schema version is “479”. The documentation currently says:
If schema version is "479", or , then enter the following commands:
@upgrade-45-45CR3.sql
@upgrade-45CR3-45CR4.sql
@upgrade-45CR4-50.sql
@upgrade-50-50CR1.sql
@upgrade-50CR1-50CR2.sql
@upgrade-50CR2-50CR3.sql
@upgrade-50CR3-55.sql
@appGrants.sql
but it should read:
If schema version is "479", or , then enter the following commands:
@upgrade-50CR4-55.sql
@appGrants.sql
I requested to update the documentation with all the issues found, so hopefully in future the documentation will be correct again.
Create tasks in “Remember The Milk” with Siri and the Apple Watch
I am a long year user of “Remember The Milk” (RTM) to manage all my tasks. Although they do still not have a native app on the iPhone, you are able to use Siri on the Apple Watch to automatically create a task in RTM without touching your iPhone.
This is really something I am using very often throughout the day. Especially as Audi has killed Siri in my A3 if the iPhone is connected via Bluetooth to the car system. Siri on the watch is still working like a charm.
Here is described how to enable Siri with RTM on the iPhone.